Crafting your own wedding decor adds a personal flair that no store-bought item can match. If you’re gearing up for your big day and your budget is whispering sweet nothings about savings, how about embracing a DIY project that’s both easy on the wallet and a feast for the eyes? Imagine creating a stunning bouquet of roses from coffee filters and glue for the jaw-dropping price of $17. That’s right, just seventeen dollars. This bit of budget genius comes courtesy of Hannah from North Carolina (with permission!), whose creativity turned a frugal find into fabulous flora.
Now, let’s talk about these roses. They’re every crafty bride’s dream: low cost, low waste, and high impact. Coffee filters offer the perfect canvas to bring any color palette to life, and they’re resilient enough to survive the excitement and chaos of a wedding day. The best part? They won’t droop or wilt when the day heats up.
This DIY journey is ideal for brides who get a kick out of crafting and the joy of declaring, “I made that!” as guests marvel at their handiwork. With a handful of supplies and a bit of time, you can create roses that add a touch of romance to any setting. Granted, it might take about 20 minutes to create each bloom, but it’s a delightful way to add a personal touch to your special day, without draining your wallet.
While it does take a bit of time to craft these beauties, think of it as a relaxing escape from the hustle and bustle of wedding planning. It’s your moment to pause, craft, and maybe even catch up on your favorite podcast.
Ready to embark on this crafty floral endeavor? The full tutorial, kindly provided by Hannah, is waiting below. It’s packed with all the tips and tricks you need to create these charming, everlasting blooms.

And here’s a sweet thought—these roses can live on past your wedding day. They can bloom in your home, serve as keepsakes for guests, or even inspire the next crafty bride who catches one.
Ready to get your hands on the tutorial and start this floral journey? The full tutorial, kindly shared with us by Hannah herself, is below and complete with all the tips and tricks to create these everlasting blooms.
Complete Tutorial: How to Create Artificial Flowers for Your Wedding
Supplies:
- Acrylic paint
- Water
- Coffee filters
- Scissors
- Thin wire
- Wire cutters
- Bamboo skewers
- Elmer’s glue
- Paint brush
Steps:
- Dye
- Cut/dry
- Assemble
Dye:
- Dilute acrylic paint in water
- Dip coffee filters in mixture
- Dip them in stacks, not one at a time
- By dipping the edges in one color, letting it partially dry, and dipping the middle in another color, you can achieve a starburst look
- Separate any large stacks into smaller stacks and allow to partially dry
Cutting and Drying
You will need two kinds of petals, inner and outer. For each rose you will need 4 outer sheets and 3 inner half-sheets. Because of this you will need to cut roughly 4x more sheets into outer petals than inner petals. You may cut multiple layers at once.
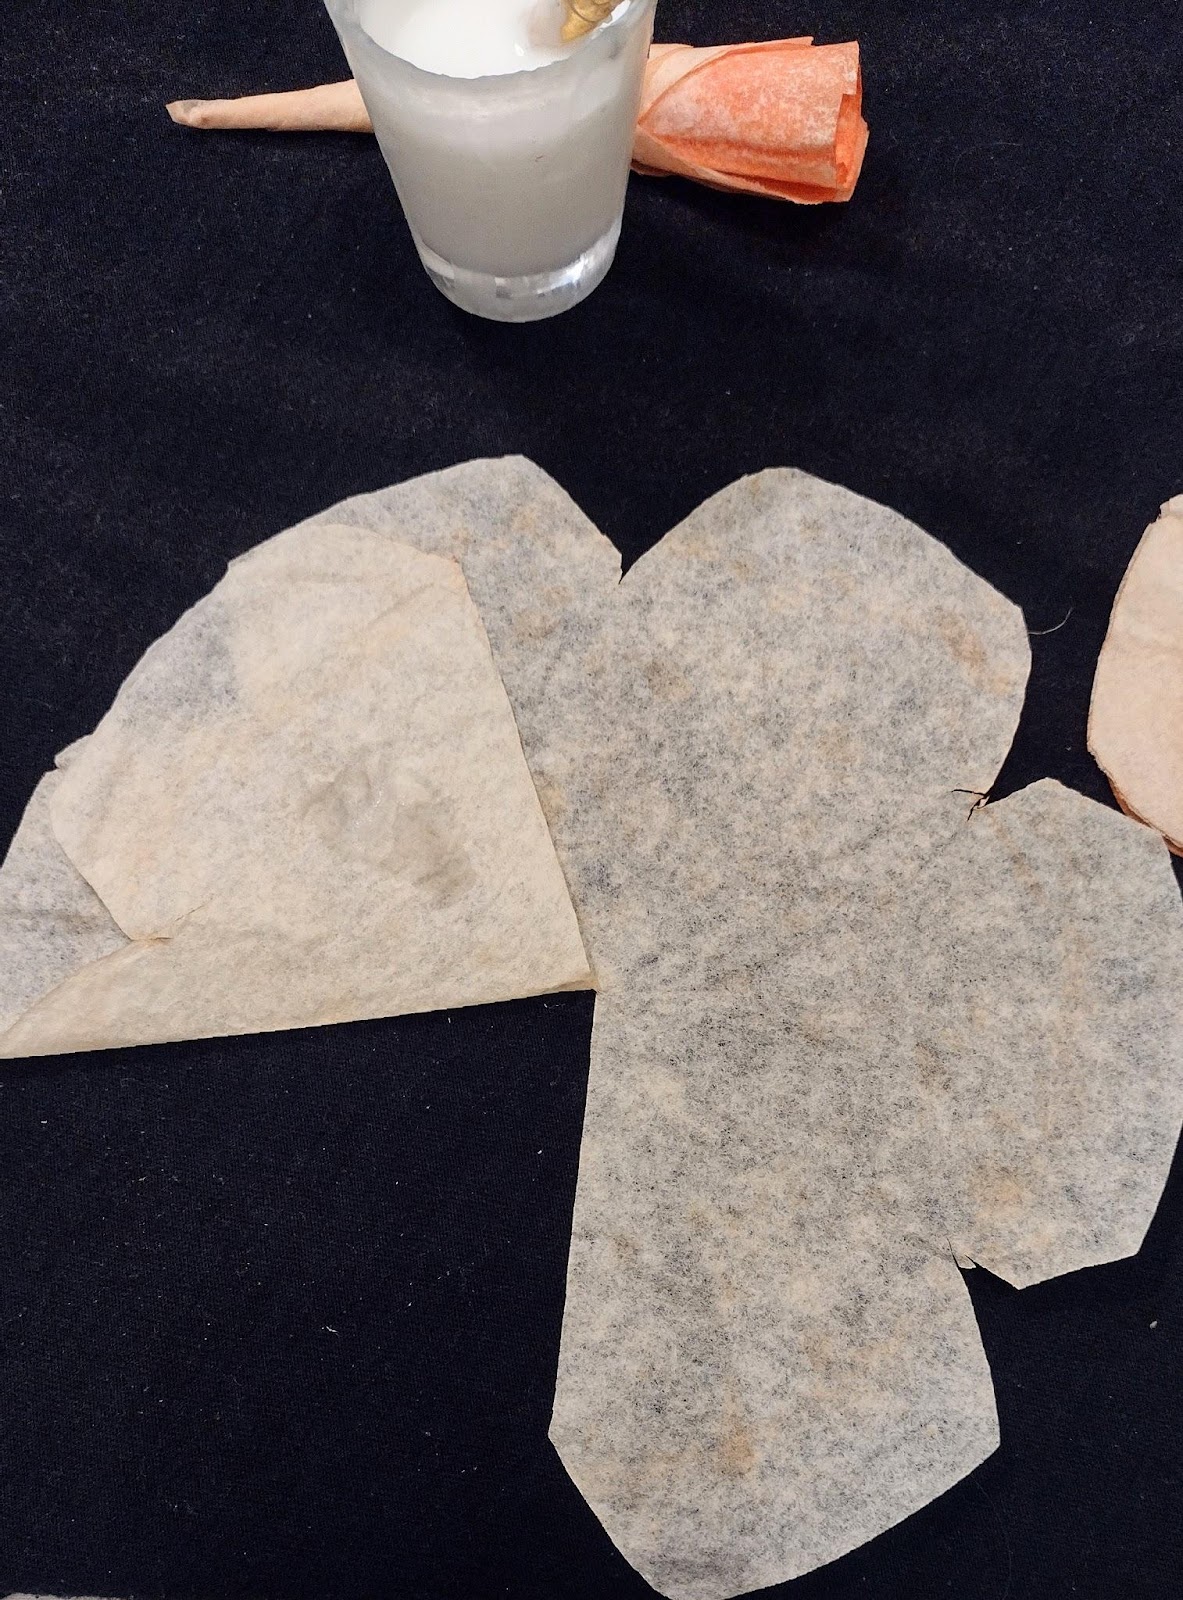
Outer petals:
- Fold damp sheets into half and then into thirds to create sixths
- Cut a shallow “m” shape
- Unfold and cut one slit from one edge, stopping at the center

Inner petals:
- Fold damp sheets into eighths
- Cut a rounded “v” shape
- Unfold and cut in half
- Cut a slit from the peak of the center petal continuing halfway down

After petals are cut, lay sheets out so they may dry. (They do not need to be fully dry to assemble.)
Assembling pt 1.
You will need 3 half-sheets of inner petals and 4 sheets of outer petals.
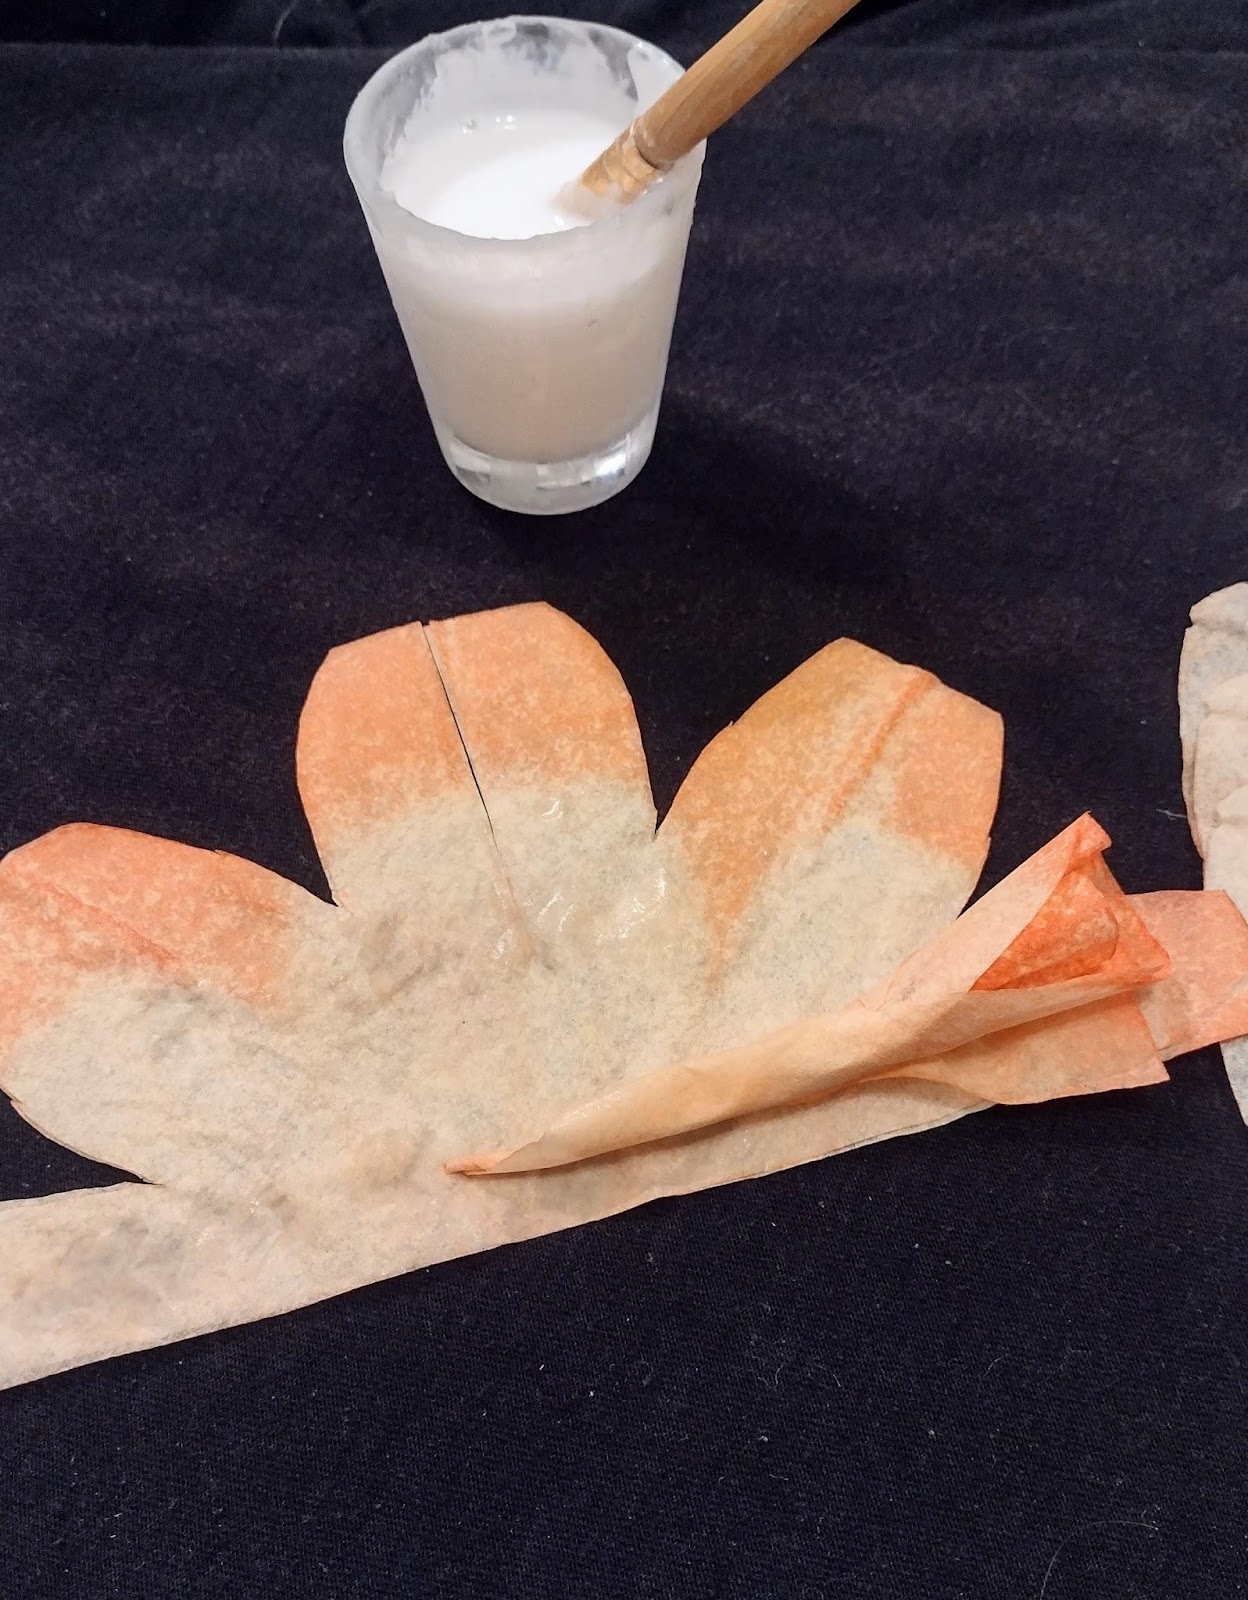
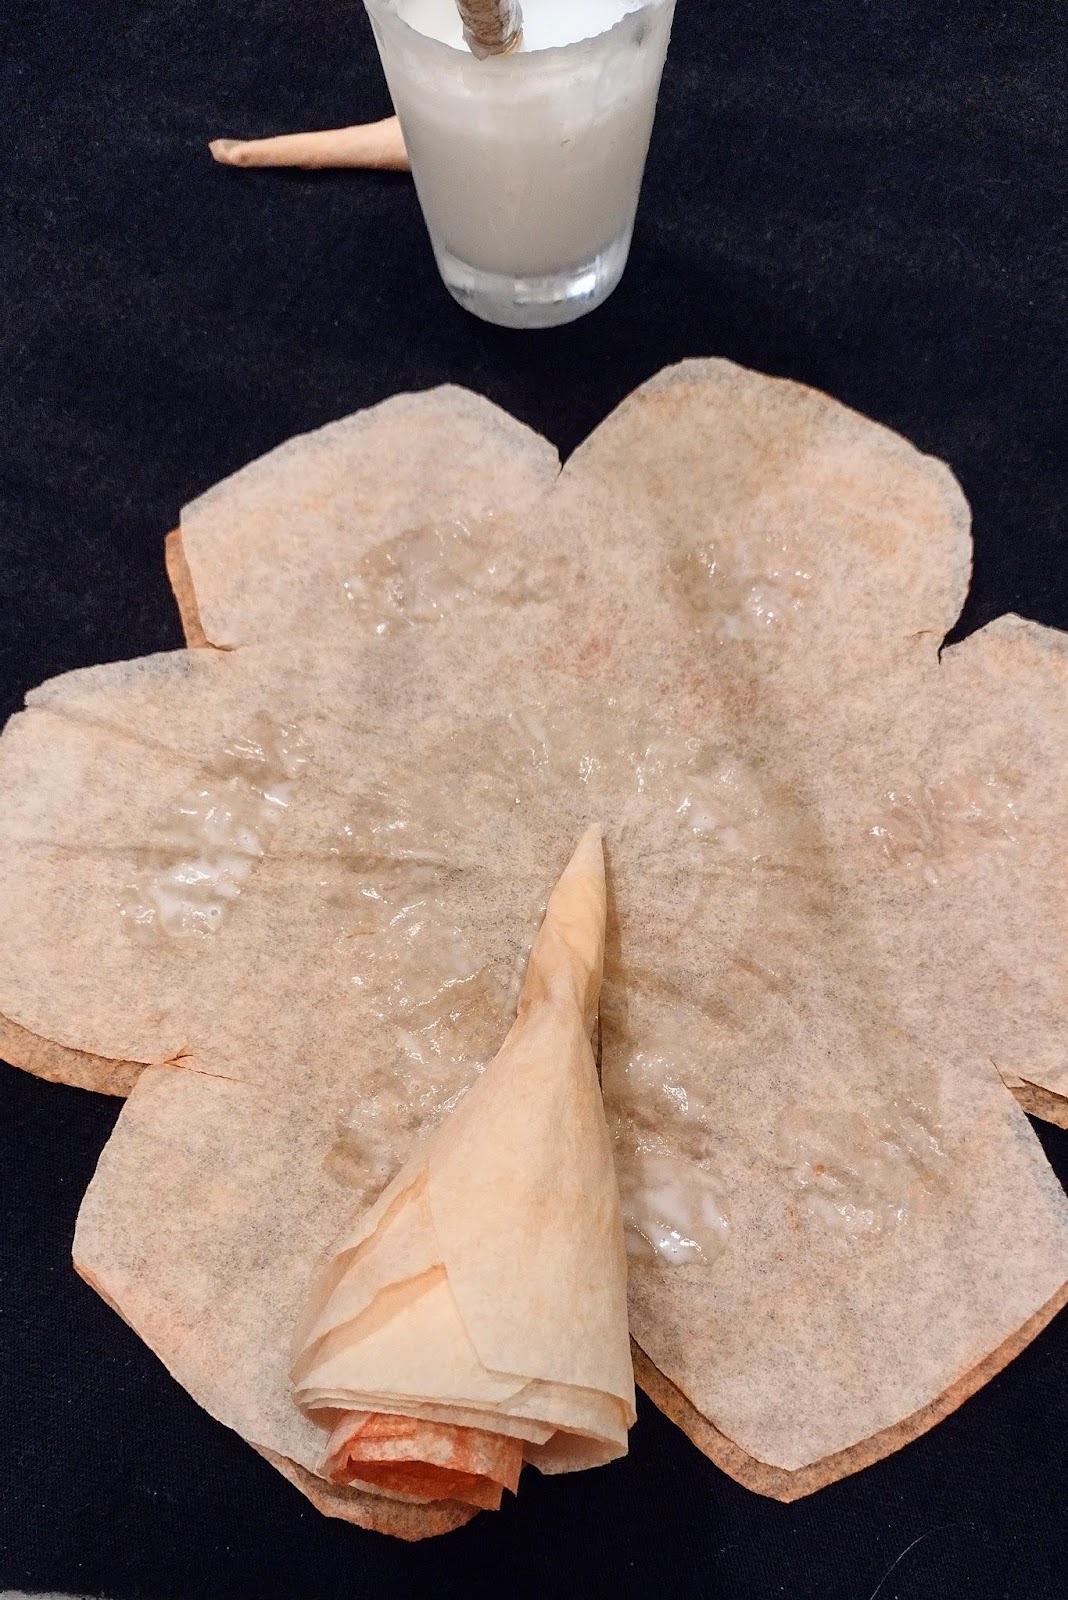
Inner petals:
- Mix elmer’s glue and water to create a thin glue mixture. Apply to inner petal half-sheet as shown below (red)
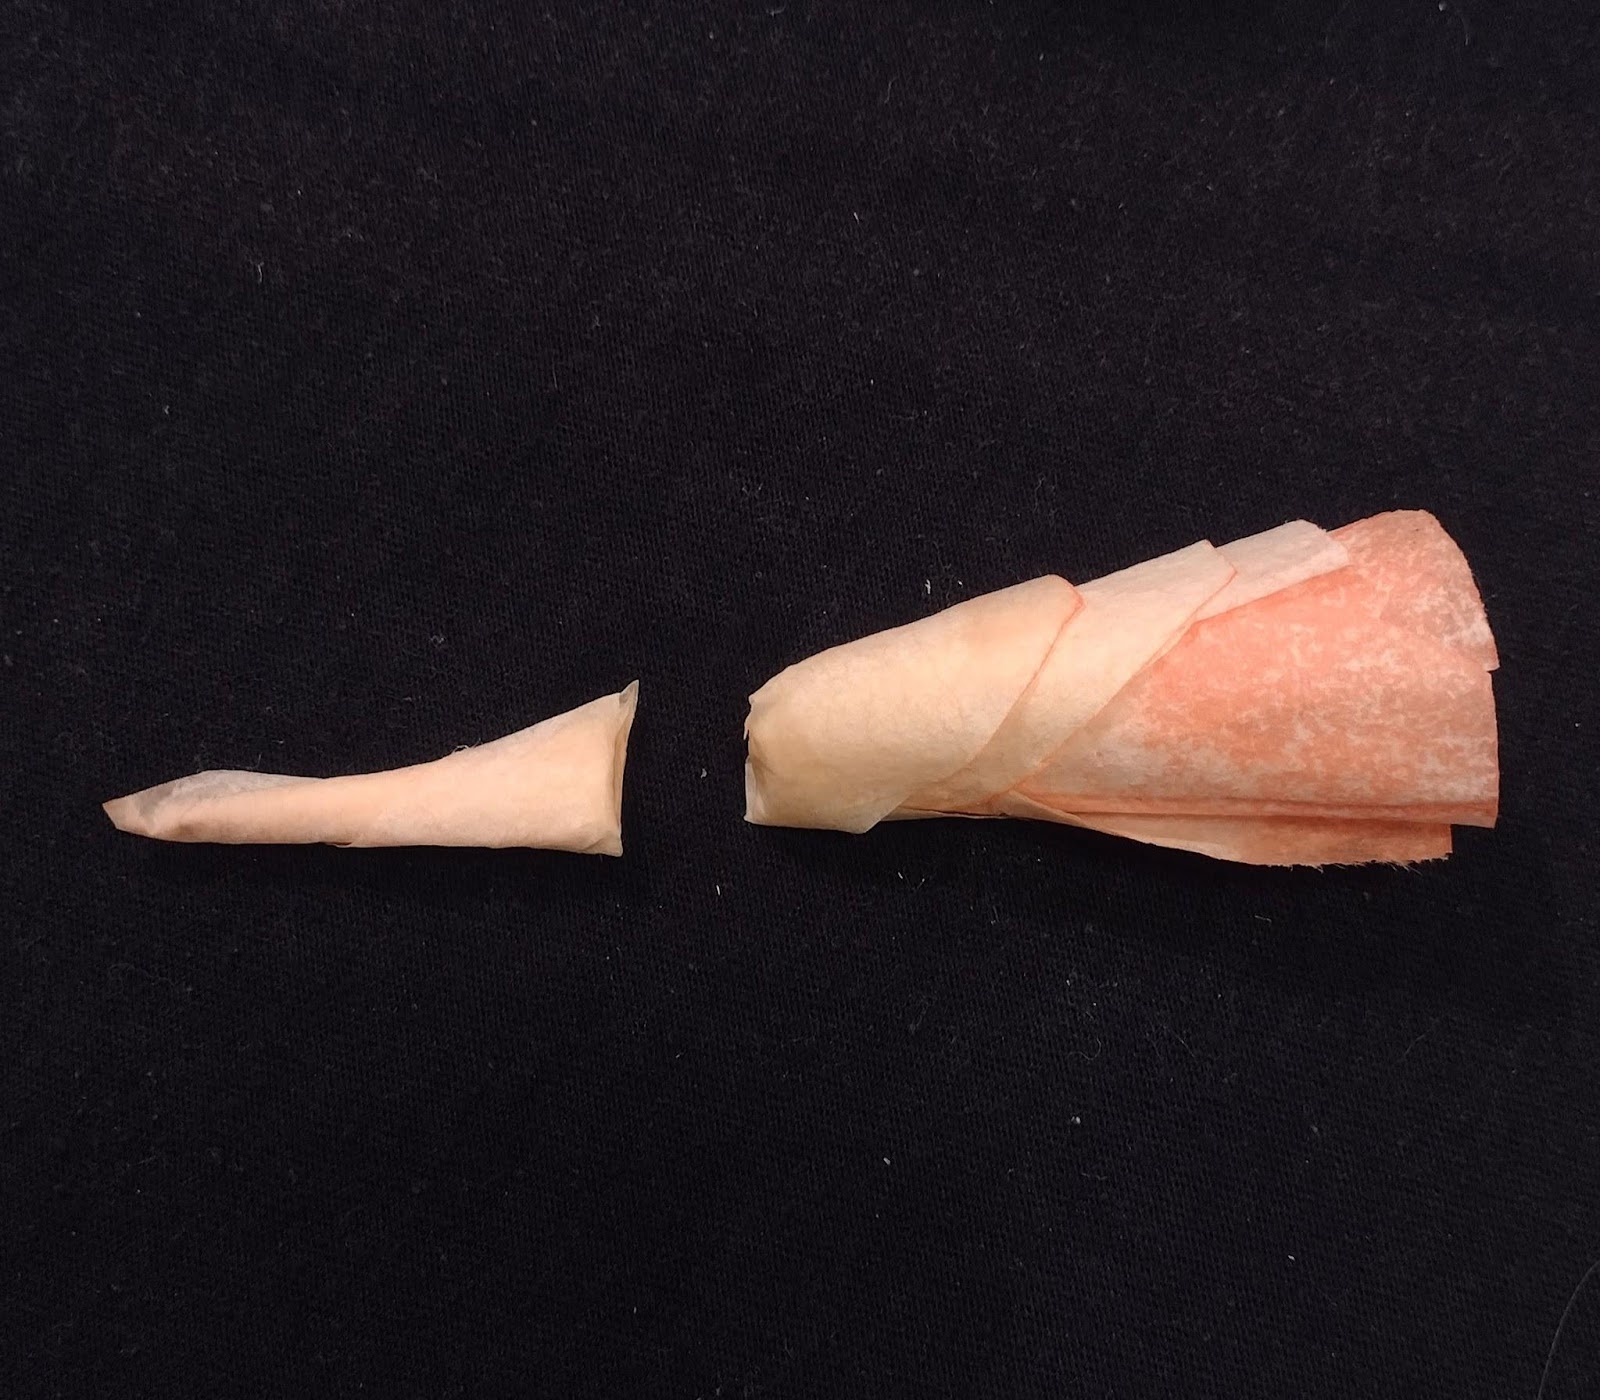
- Starting at one side, roll sheet into a cone
- Apply glue to the next sheet, place cone on it and roll. Do this again to use all 3 inner petal sheets
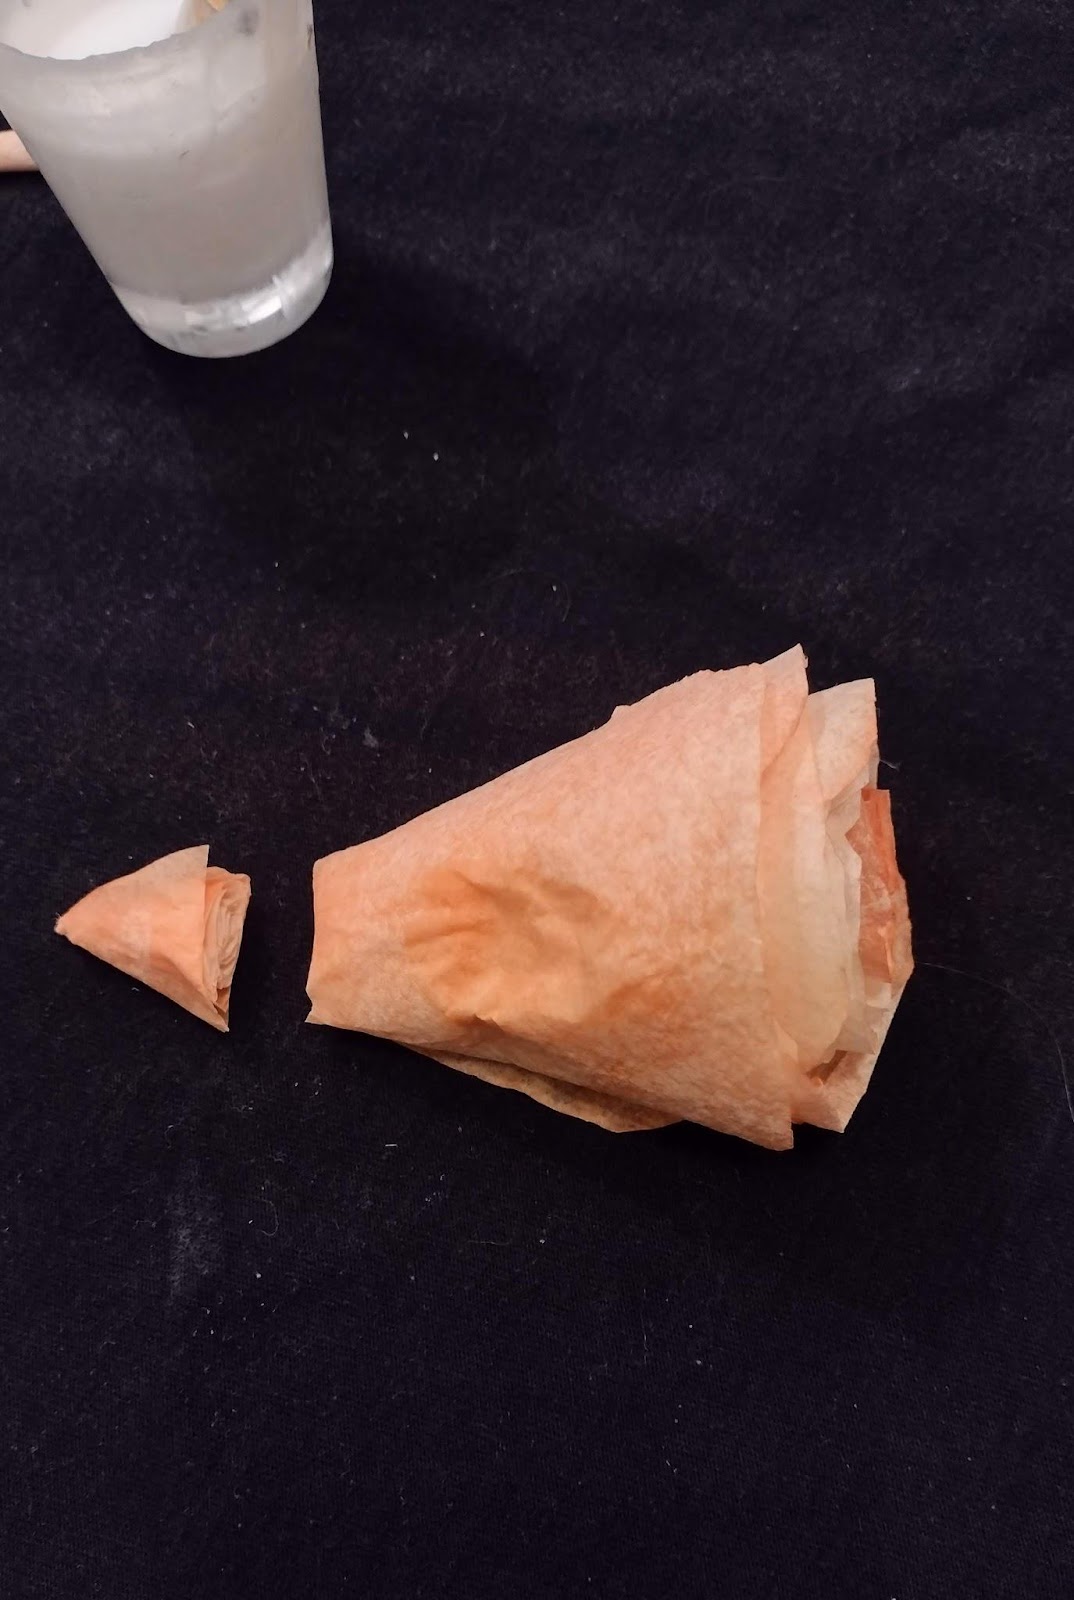
- Cut the end off of the cone

Outer sheets
- On the first and third outer sheets: fold over the first petal and apply glue as shown below (red)
- Place cone on sheet and roll
- On the second and fourth outer sheets: do not fold over the first petal. This will ensure the petals are staggered and look realistic. Apply glue.
- Place cone on sheet and roll
- Repeat until all 4 outer petal sheets are used

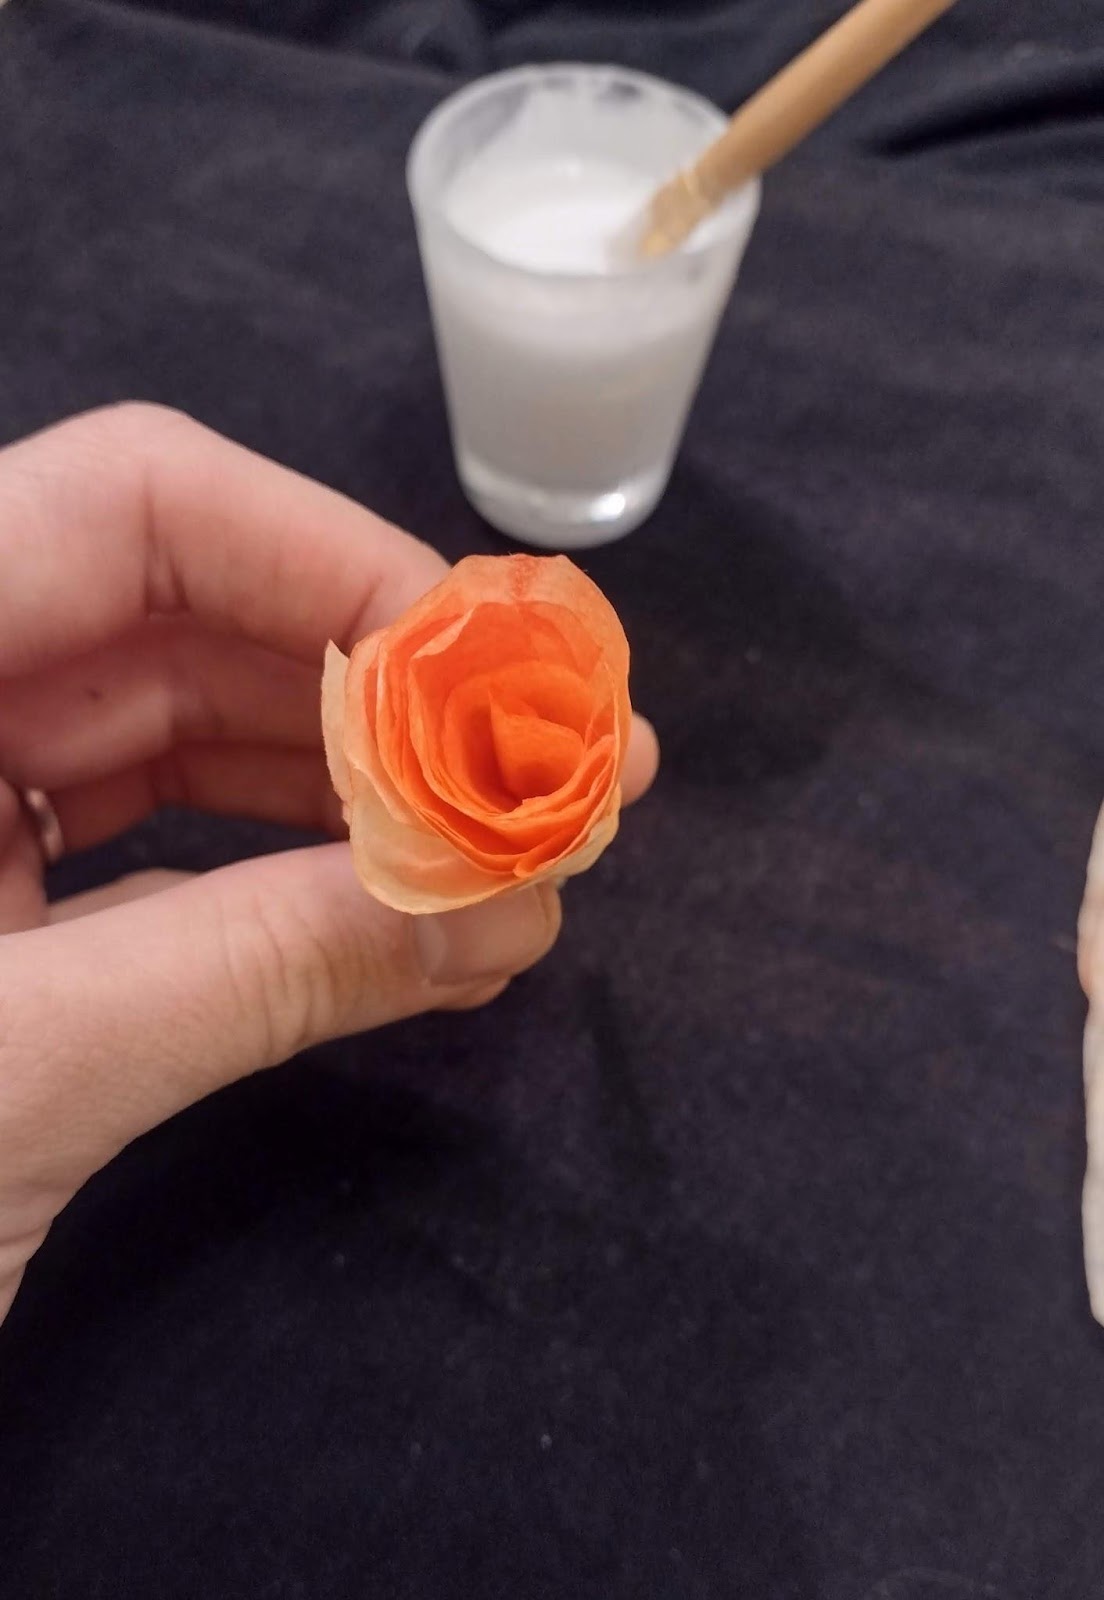
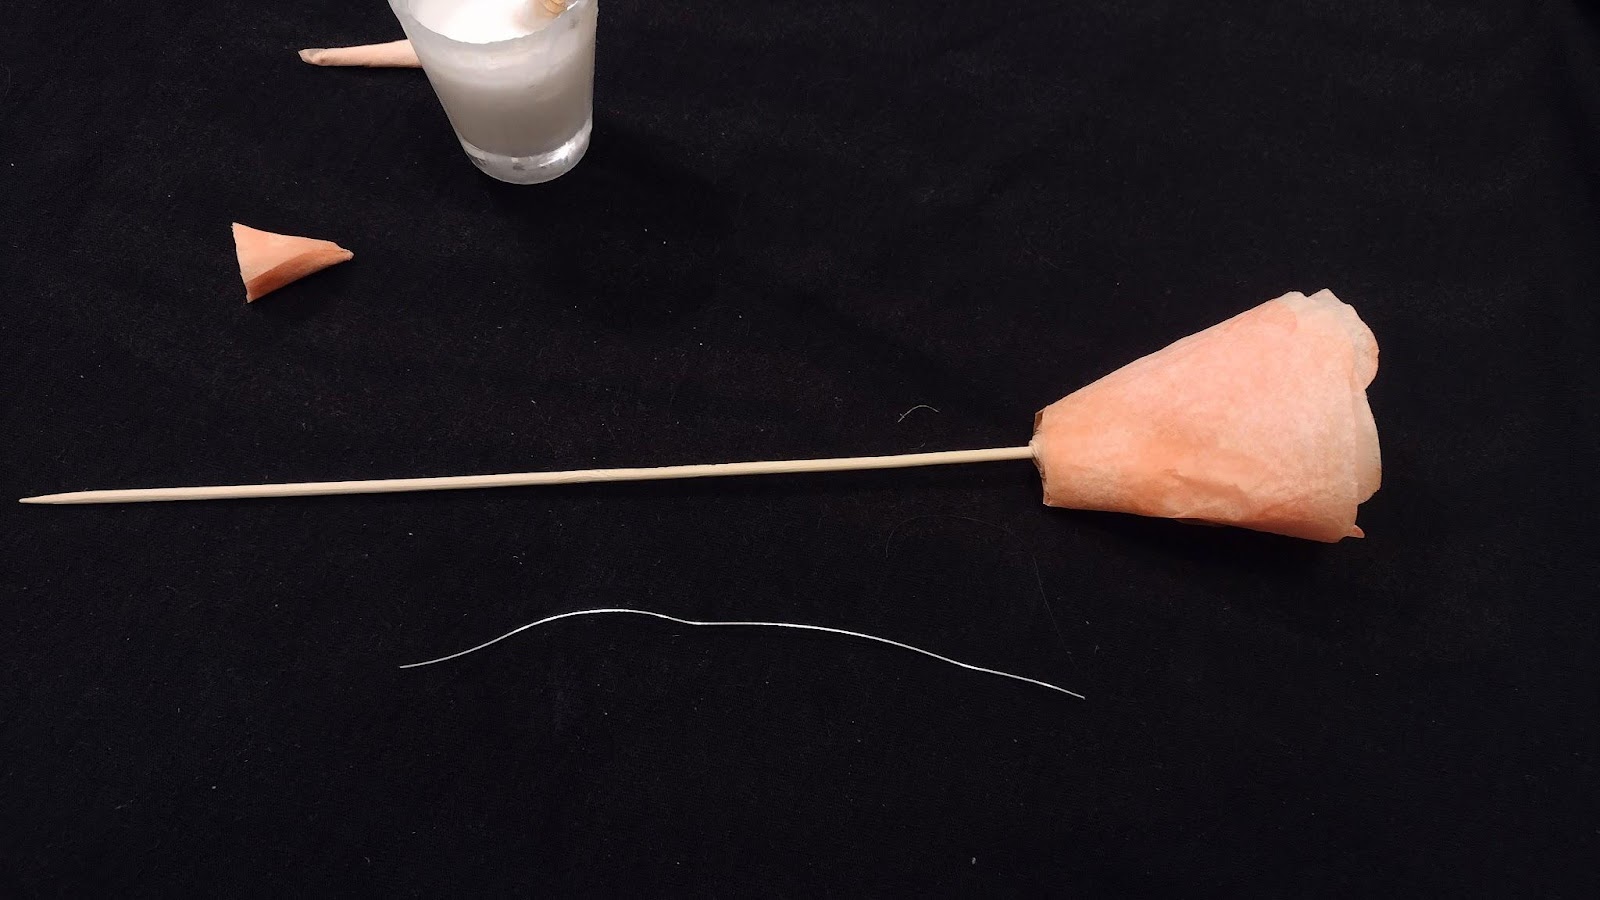
Assembling pt 2.
- After all sheets are rolled, cut the end off of the cone
- Insert bamboo skewer near the middle on the flower
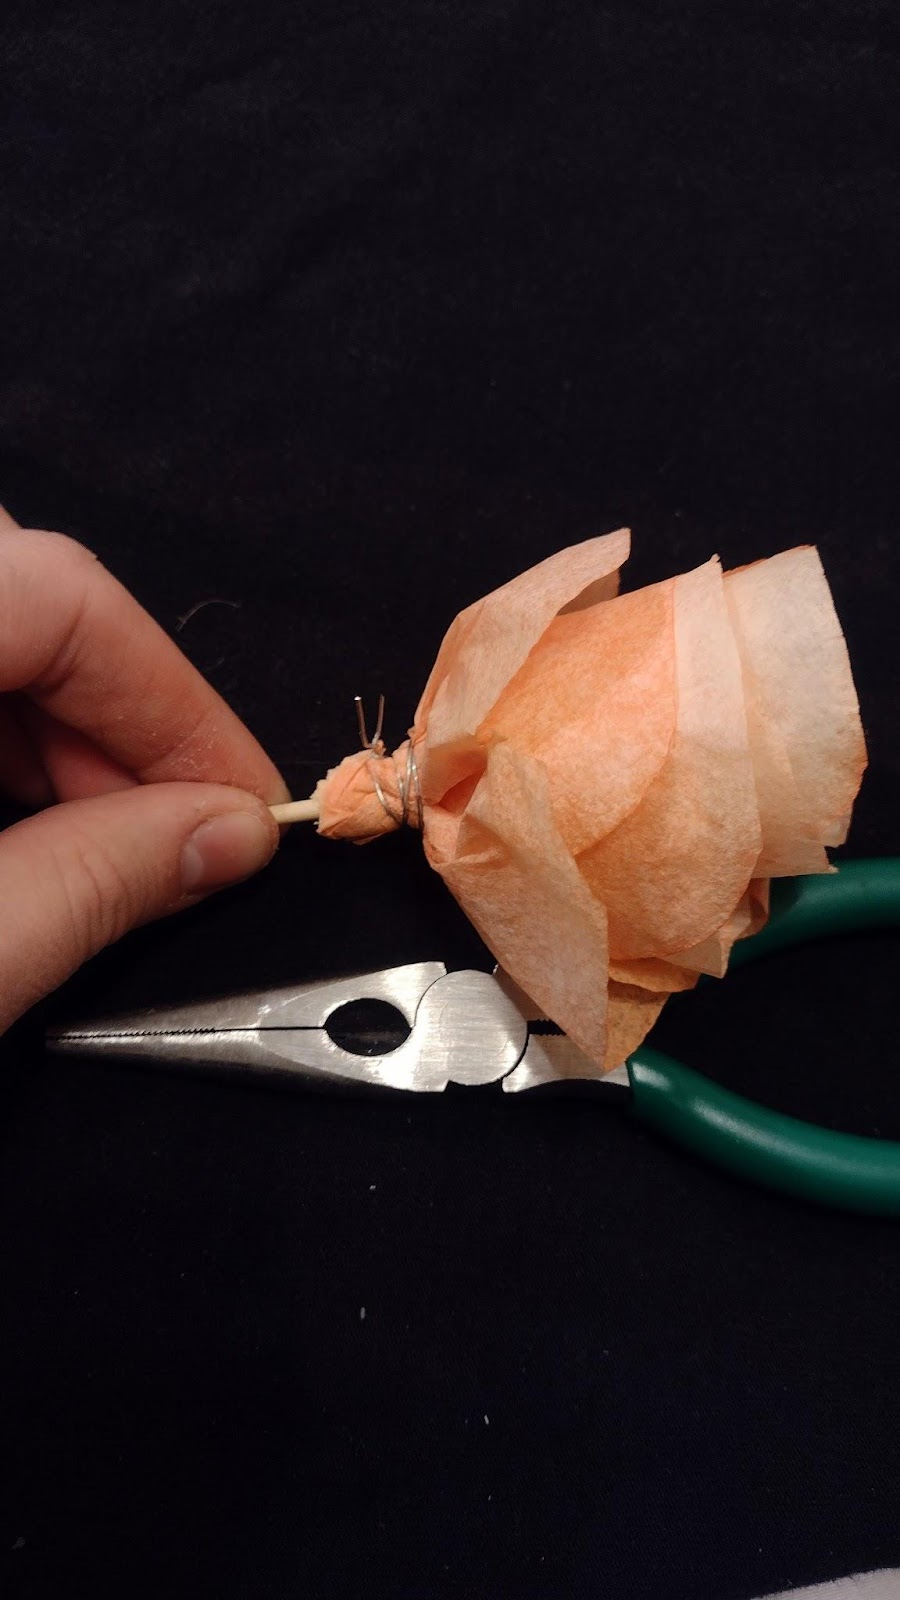
- Wrap wire around base of flower and tighten
- The higher you wrap the wire, the more loose and open the flower will be
- Add finishing touches such as opening and curling the petals

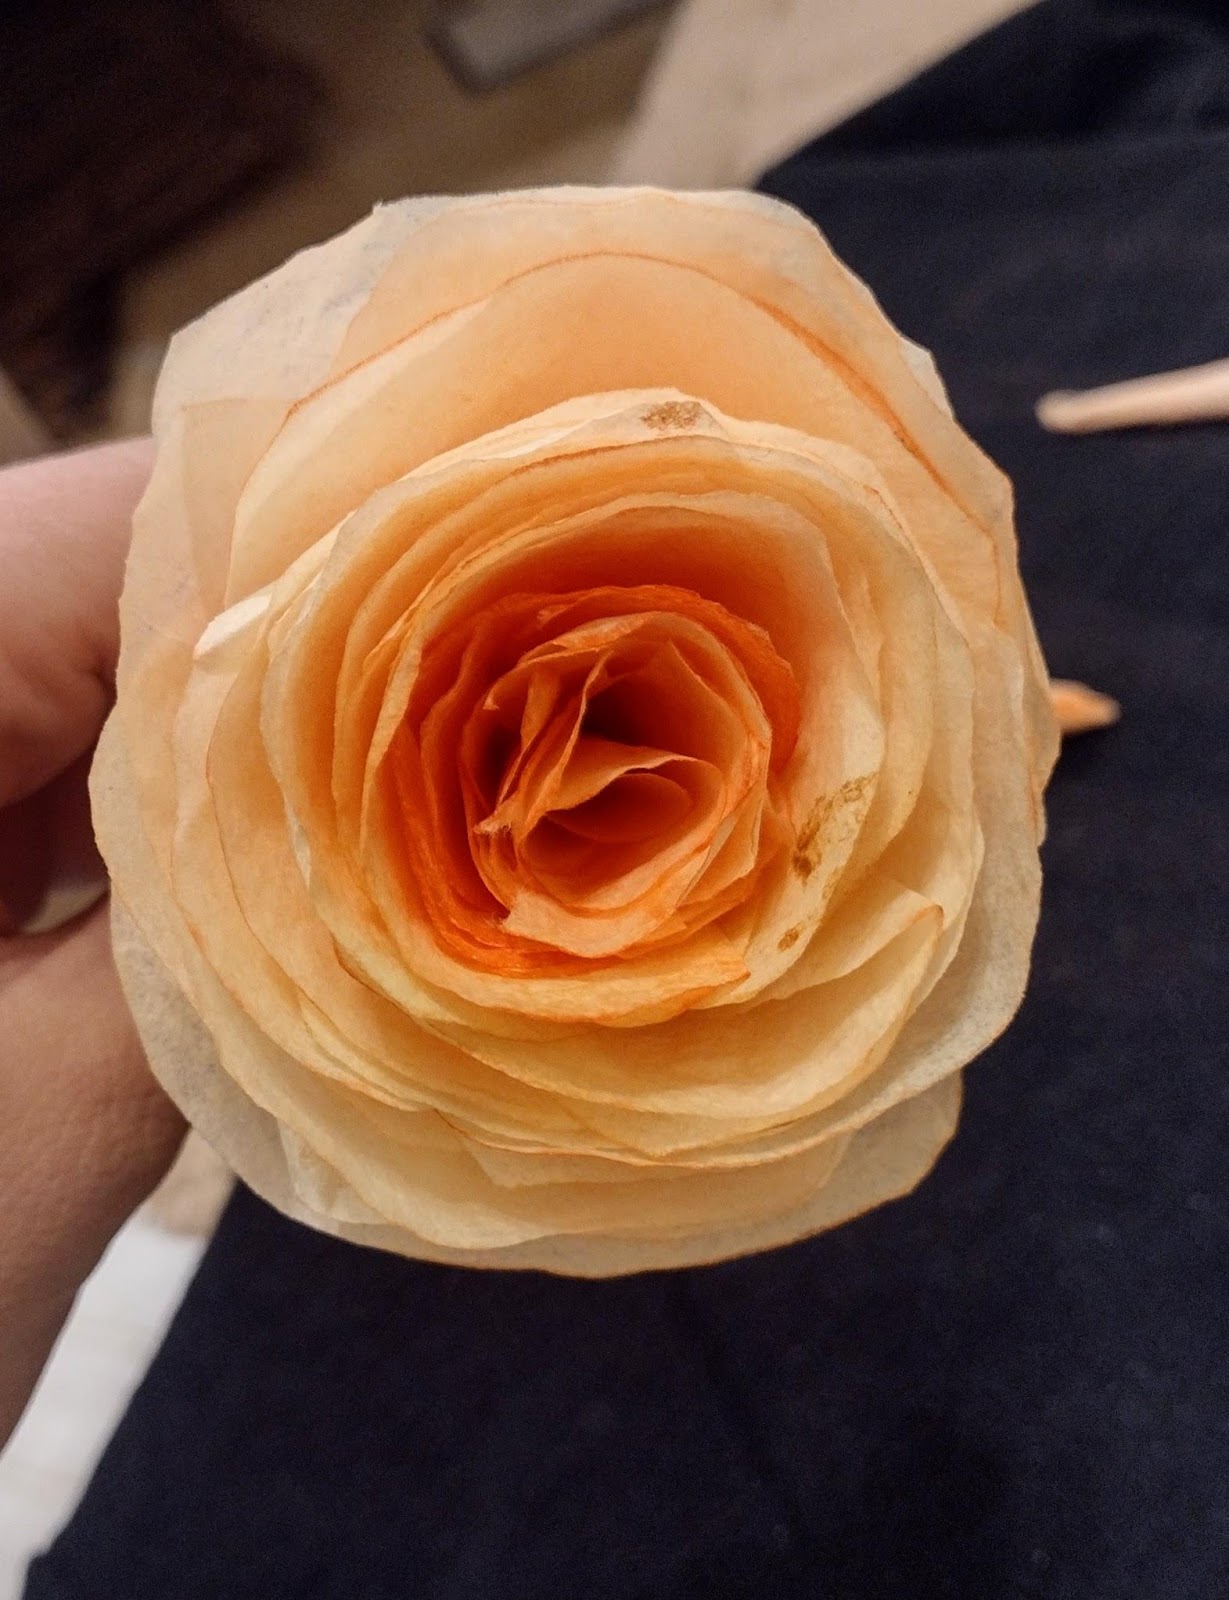
Photo guide:
Dying/cutting


Assembly: